Table of Contents
This comprehensive guide will help you install, set up, and customize your LawDesk Lawyer Website Template to create a professional, modern, and client-focused legal website for your law firm or legal services.
Lawdesk Pro Theme Documentation
Introduction
Customizing Your Website
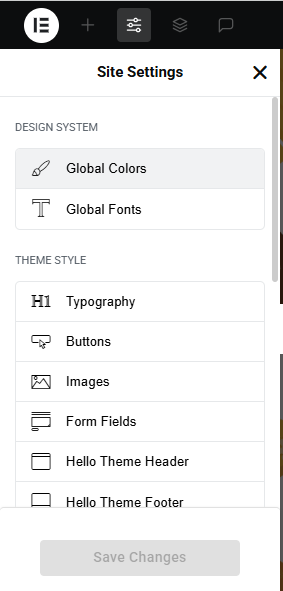
Global Settings
To set global styles:
- Go to Elementor > Site Settings.
- Adjust typography, colors, and layout settings.
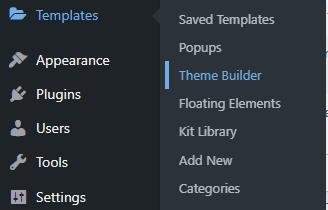
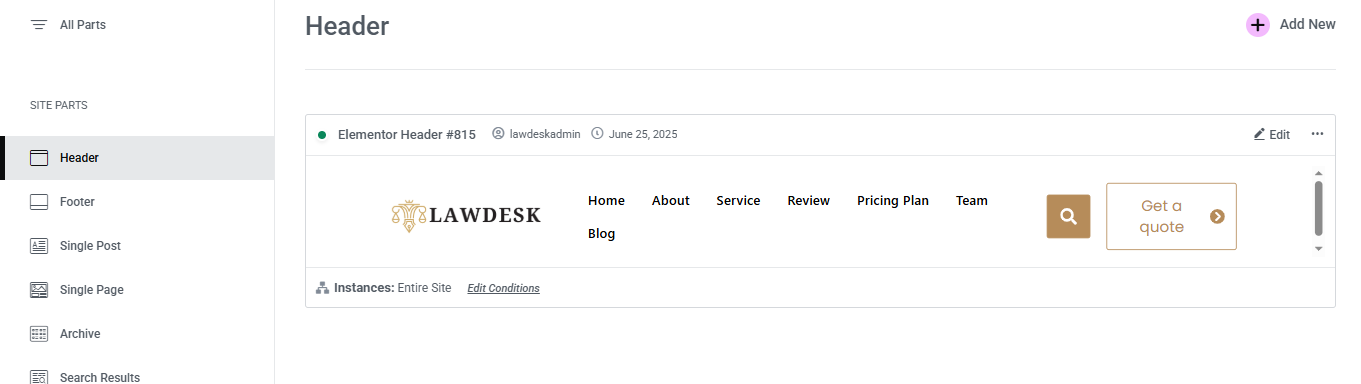
Header & Footer Setup
- Use Elementor Theme Builder to edit the header and footer.
- Customize the navigation menu, logo, and contact details.

You can drag and drop the elementor widget’s menu first. If you’d like, you can add items or simply drag each one, after which you can add a icon list from the widget and apply a custom style from the style option.
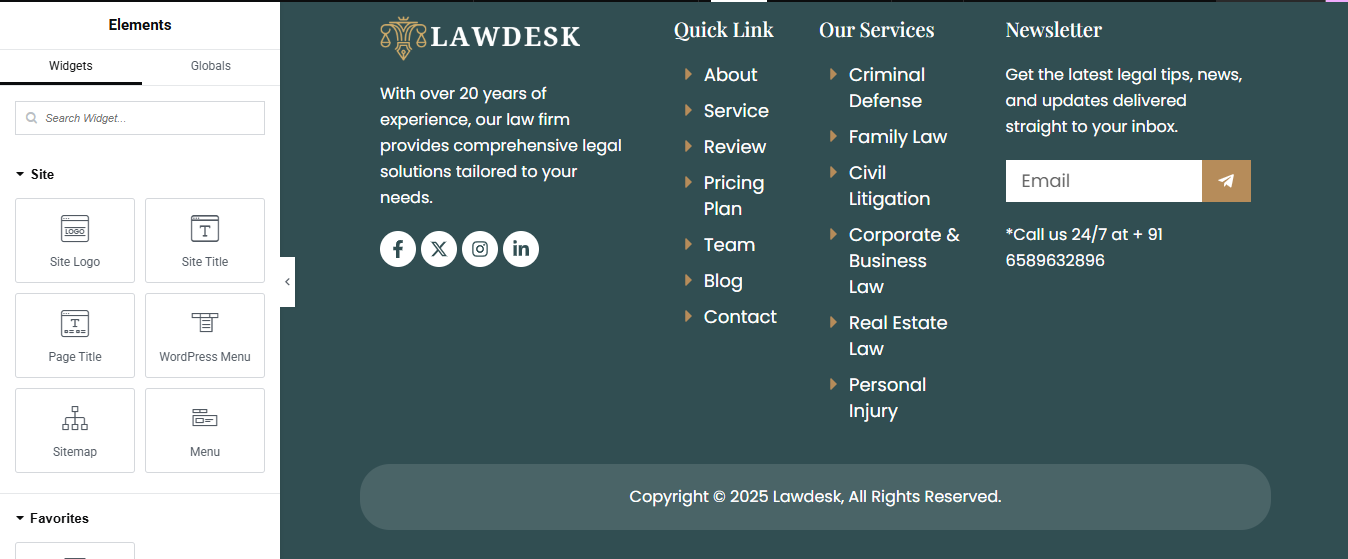
you can add newslatter form, timing, contact details, logo, gallery, menu and if you wish in footer, and create you best design.
Home Page Setup
Using Pre-Built Layouts
Navigate to Setting >> Reading
Choose the Static Page option.
Choose an existing homepage or create a new one.

Add The Section in home page using elementor
Add components such as these using the Drag & Drop Builder:
- Hero Slider Section
- partner logo section
- About section
- service section
- achievement section
- free consultation
- CTA section
- review section
- pricing section
- team section
- blog section
- contact section
Main Hero Section
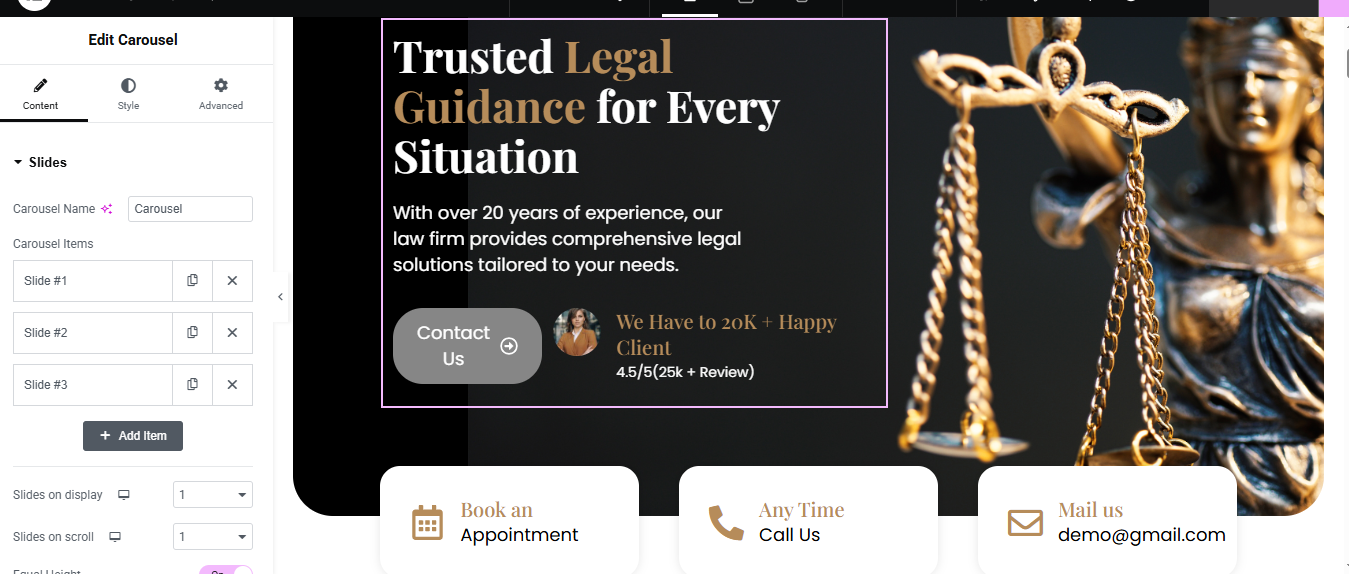
Add the Carousel Widget
- In the left column, drag the Carousel widget (from your plugin)
- Under Content > Slides:
- Click Add Item for each slide
- For each slide, add:
- Title:
- color, typography, font-weight, font-size
- Description:
- color, typography, font-weight, font-size
- Button Text: Contact Us
Client Info Box:
- Example: We Have 20K+ Happy Clients – 4.5/5 (25k+ Reviews)
- Style each slide using Style tab (adjust padding, colors, text size, etc.)
- Add the Right-Side Image
In the right column, drag an Image widget
- Upload the Lady Justice image or any related law-themed image
- Set image size and alignment to match your design
Add Info Boxes Below Slider (Optional)
- You can create 3 info boxes like:
Steps:
- Below the slider section, add a new section with 3 columns
- In each column, add an Icon Box or use Image + Heading + Text
Logo section

Add a New Section
- Open the page in Elementor
- Click “+” Add Section
- Choose a 1-column layout
Set the background color (optional)
- Drag and Drop the Image Carousel Widget
- In the Widgets panel, search for “Image Carousel”
- Drag it into the section you just created
Upload and Select Your Logos
- Under Content > Images, click +
- Upload or select your logo images from Media Library
- Use transparent PNG or SVG for best result
- Click Create a New Gallery → Insert Gallery
About Section

Add a New Section
- Click the ➕ icon → select a two-column layout (50/50).
- Set Content Width to Full Width for a clean, wide layout.
2. Left Column — Insert Image
- Drag and drop the Image widget.
- Upload or choose your photo.
- Align it (e.g., center or full height) under the Style tab.
- For full vertical stretch: Section settings → Height: Min Height, e.g., 600px Image → Advanced → set Vertical Align: Middle
3. Right Column — Add Text and Content
- Subtitle: Drag a Text Editor or Heading widget Set it as smaller text like “Who We Are”
- Title: Add a Heading widget Use a strong headline like “Trusted Experts in Electrical Services”
- Icon Boxes :
- Drag in an Inner Section into the right column → make it 50/50.
- In each column, drop an Icon Box widget:
- Button: Drag in a Button widget labeled “Learn More” Link it to your About page or contact form
Service Section

Add an Image Box Widget to Each Column
- In the first column, drag in the Image Box widget
- Repeat the same for second and third columns
Style the Cards
Go to the Style tab for each Image Box:
- Image Style:
- Image Position: Top
- Alignment: Center
- Border Radius: 50% (to make it a circle)
- Size: 80–100px
- Content Style:
- Title Typography: Bold, 18–22px
- Text Color: Black or dark gray
- Title Color: Gold or dark brown (#c29a5b or similar)
- Box Style:
- Background Color: Light gray or white
- Border Radius: 20px
- Box Shadow: Optional (for soft 3D look)
- Padding: 30px
Achievements Section

Insert Icon Boxes or Counters
- Drag and drop the Icon Box or Counter widget into each column.
- For Icon Box:
- Add an icon (like a trophy, star, or badge).
- Title it (e.g., “100+ Projects”).
- Add a short description if needed.
- For Counter:
- Set the number (e.g., 250).
- Add a label
Style the Section
- Go to the Style tab for each widget:
- Adjust typography, colors, and spacing.
- Add hover effects or animations for flair.
Add a Background (Optional)
- Click the section handle → Style tab → Background.
- Choose a solid color, gradient, or image to make it pop.
Consultation Section
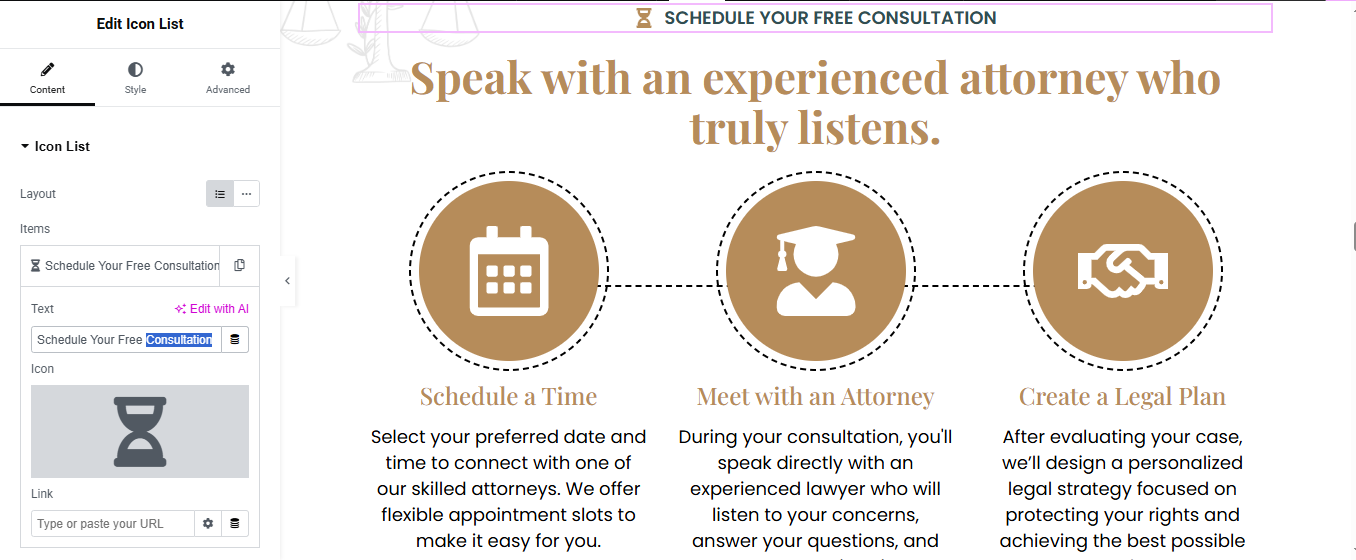
Insert Icon Box Widgets
- Drag the Icon Box widget into each of the three columns.
- For each Icon Box:
- Icon: Choose a relevant icon (e.g., phone, calendar, chat).
- Title:
- Description:
Style the Section
- Adjust icon size, color, and spacing.
- Customize typography for titles and descriptions.
- Add hover effects for interactivity.
Add Section Background (Optional)
- Click the section handle → Style tab → Background.
- Choose a solid color, gradient, or image to enhance visual appeal.
CTA Section

Add a New Section
- Click the ➕ icon in Elementor → choose 1 column layout.
- Set Content Width to Boxed or Full Width depending on your site style.
2. Set Background (Optional but Recommended)
- Go to Section Settings → Style tab.
- Under Background Type, select a color or image that fits your brand.
- Use a light overlay if your background image needs better contrast with the text.
3. Insert and Style the Content
- Subtitle: Drag a Text Editor or Heading widget, style it smaller.
- Title: Drag a Heading widget below the subtitle, use a bold engaging message.
- Button: Drag a Button widget under the text.
- Label it: “Explore More” or “Call Now”
- Add your link: phone number (tel:+911234567890), quote form, or contact page.
Testimonial Section

Insert a Carousel Widget
- If you’re using Elementor Pro, drag in the Slides or Testimonial Carousel widget.
Configure the Carousel
- Add 3 testimonial items (or more if you want it to auto-slide through them).
- For each item:
- Add a photo (optional).
- Add the review text.
- Include the reviewer’s name and title.
Set Columns to 3
- Set it to 3 so three reviews show side-by-side.
Style the Reviews
- Go to the Style tab:
- Customize typography, colors, and spacing.
- Add box shadows or borders for a card-like look.
- Use hover effects for interactivity.
Pricing Plan Section

Add a New Section (3-column layout)
- Drag in “Pricing Table” or “Inner Section”
- Add content manually if free Elementor
- Each column = 1 plan
- Add:
- Title (Basic, Premium, etc.)
- Price (₹199/month)
- Feature List (✓ Feature 1, Feature 2…)
- Call-to-action Button (e.g., “Buy Now”)
Style Section
- Add hover effect, border, background color
Team Section Section

Add a New Section
- Click ➕ → choose 1 Column layout
- Drag in Heading widget → add your Subtitle
- Drag in another Heading → add your Main Title
- Style them (alignment, typography, color) under the Style tab
2. Add Inner Section for Team Layout
- Drag an Inner Section widget below the titles
- Right-click on a column → Duplicate 3 times (you’ll now have 4 columns)
3. Add Team Member Content to Each Column
- For each column:
- Image Widget → Upload team member photo
- Heading Widget → Add Name
- Text Editor → Add Role (e.g., “Senior Electrician”)
- (Optional) Add Social Icons Widget
- (Optional) Add Text Editor for a short bio or description
4. Style the Team Cards
- Select each column or inner section → use the Style tab to:
- Set background color or border
- Add padding for spacing
- Add hover effect if desired
Blog Section

Add Posts Widget
- (Choose method based on Elementor version)
- Elementor Pro (Posts Widget)
- Drag the “Posts” widget into the section.
- Posts will automatically show your latest blog posts.
- Customize:
- Layout: Grid / Carousel / Masonry
- Columns: 2 or 3 recommended
- Show/Hide: Title, Excerpt, Author, Date, etc.
- Image Size: Thumbnail, Medium, Custom
Style the Blog Section
- Use the Style tab to customize:
- Title typography and color
- Card background or shadow
- Read More button style
- Image border radius
Optional Features
- Add Filter by Category (Pro only)
- Add Load More or Pagination
- Add Animations or Hover Effects
Contact Section

Left Column: Add the Contact Form
- If you have Elementor Pro:
- Drag in the Form widget.
- Add fields like Name, Email, Subject, and Message.
Right Column: Add Contact Details and Image
- Image:
- Drag the Image widget to the bottom of the right column.
Icon Boxes:
- Below the image, drag in Icon Box widgets for each contact method:
- Address
- Phone
Choose a fitting icon.
- Add a title
- Add the actual contact info in the description.
Style the Section
- Use the Style tab to:
- Match your brand’s colors and fonts.
- Add spacing, borders, or shadows for a clean layout.
Empower your legal journey with clarity and confidence. At LawDesk, we deliver trusted, results-driven legal solutions tailored to your unique needs. Whether you’re navigating a complex case or seeking proactive counsel, our dedicated team is here to guide you every step of the way. Choose experience, choose integrity—reach out today and let’s move forward together.